Not all of us have the time or money to frequent the salon, and with so many adorbs (but complicated) nail sets out there, some of the most viral designs look impossible to DIY without your friendly neighborhood nail tech. But don’t worry, we’re ready to break them down into actually doable designs. If you’re ready to amp up your nail skills and get tons of compliments, read on for tutorials on all your fave sets.
Croc Nails
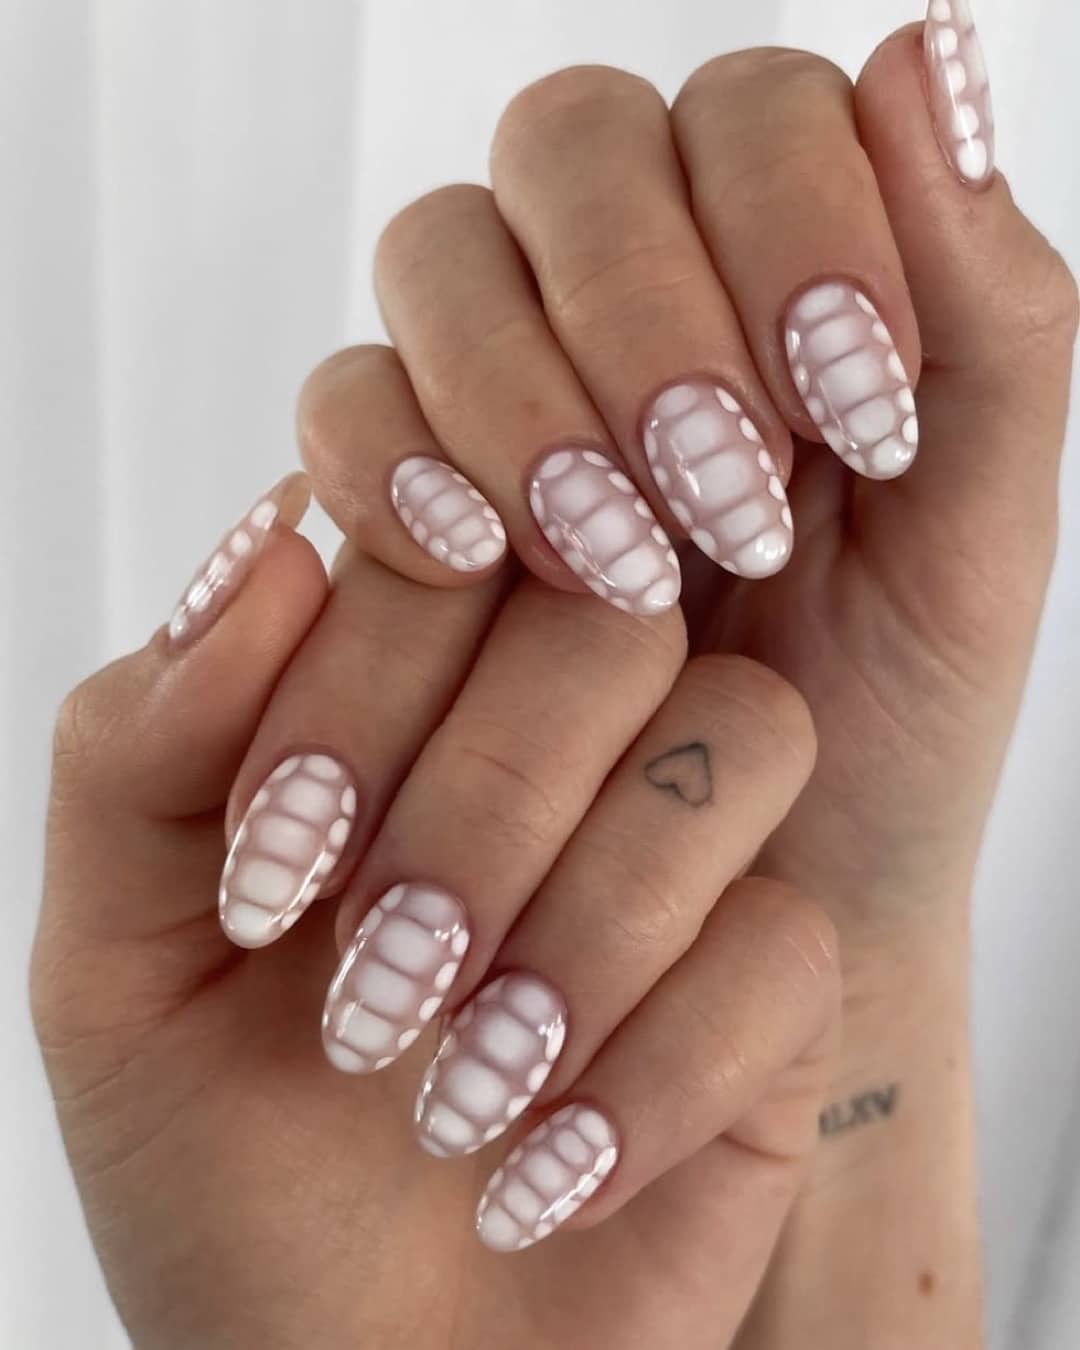
Quirky and cute, these nails have been taking the internet by storm lately. You can decorate your whole hand with this design or just use it as a pop nail. And the best part? They can come in literally any color combo you can think of, so get creative! These nails may look tricky at first glance, but with a dotting tool and some good timing, you can recreate this look in no time at all.
What you’ll need:
Two colors of normal gel polish
Blooming gel
Dotting tool
Top coat
UV light
How to: Swipe on a coat of your base color (one of the normal gel polishes) and let it cure under the UV light. Next, add a layer of blooming gel. (No curing this time, TYVM!) Use your dotting tool and your second color of normal gel polish to bedazzle your nails with vertical lines of medium-sized dots. Then, sit back and watch the magic happen. As your dots sit on the blooming gel, they’ll start to spread out until they’re almost touching. As soon as your dots hit the perf size, stick ‘em straight under the UV light to cure. Make sure to act fast once you like the size of the dots– if you’re not careful, they’ll keep spreading. As usual, finish up with a clear top coat to give your mani a glossy shine.
Aura Nails
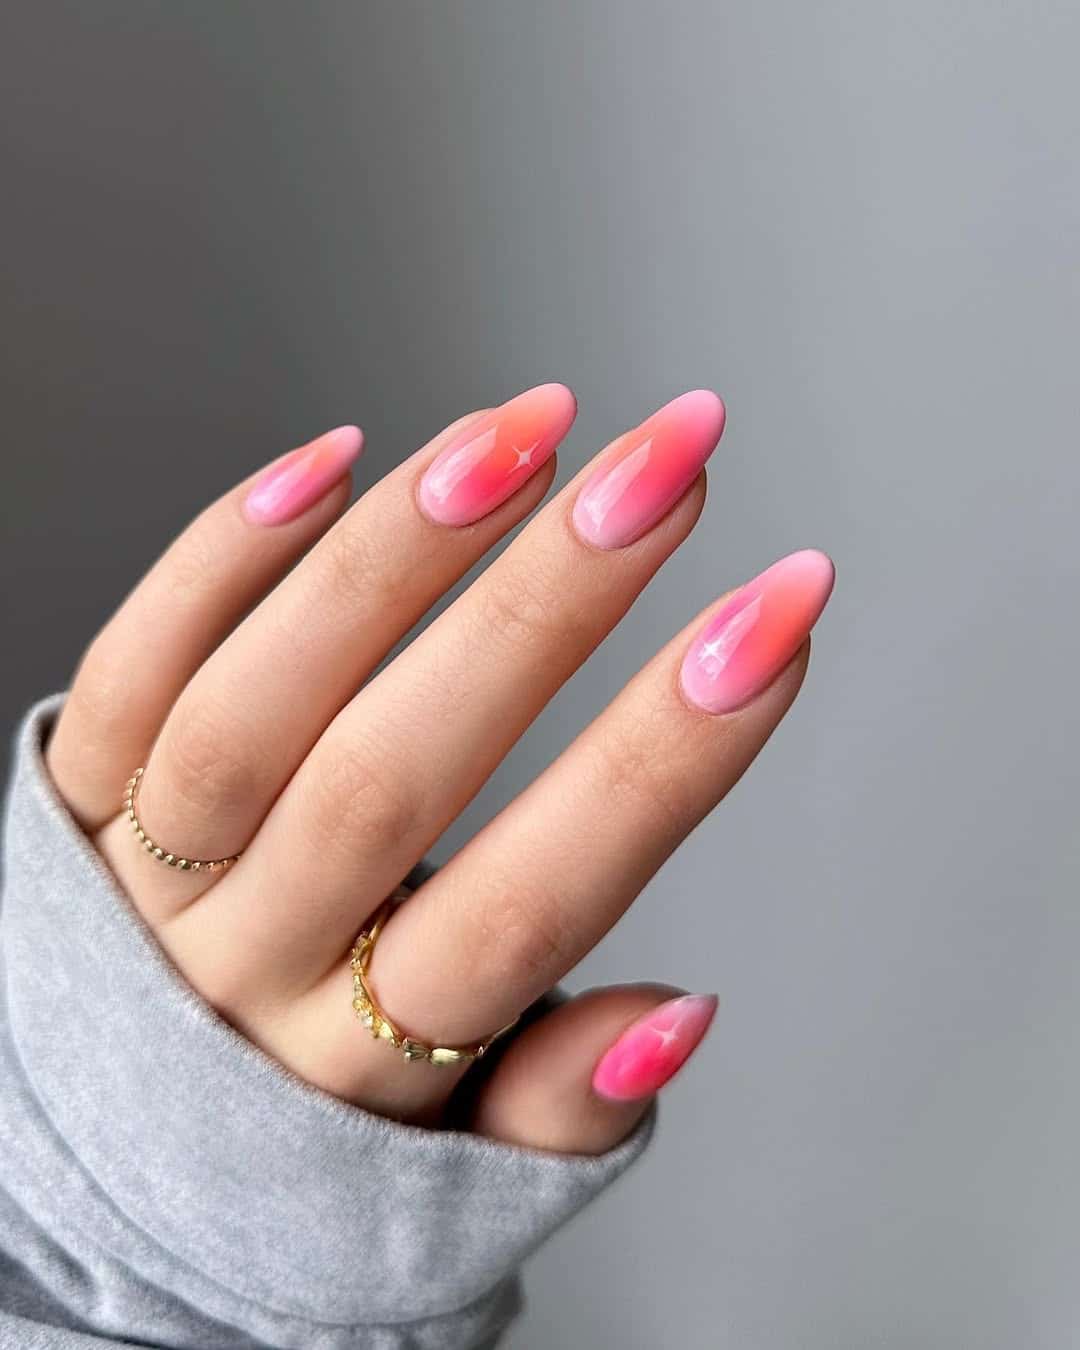
Aura nails just scream summer fun. But even if it’s not that time of year (sigh), these nails are one of the cutest designs in the book. Our only tip? Make sure the two colors you’re using are at least a little similar–it can get sorta tricky to blend two opposite colors together in the space of one nail. (Personally, we heart pink and orange!)
What you need:
Normal gel polish (two different shades)
Makeup sponge
Top coat
UV Light
How to: Paint on your beautiful base color first and let it cure under the UV light. Next, whip out your makeup sponge and dab on some of your “aura” color right in the middle of your nail. Once that’s cured, keep on adding more layers of aura with your sponge, adding less and less each time as you move outward (curing in between each layer). Do this until it looks all the way blended. You’ll know when you know, trust! Swipe on a clear top coat as your final layer, and you’re done.
Tortoiseshell Nails
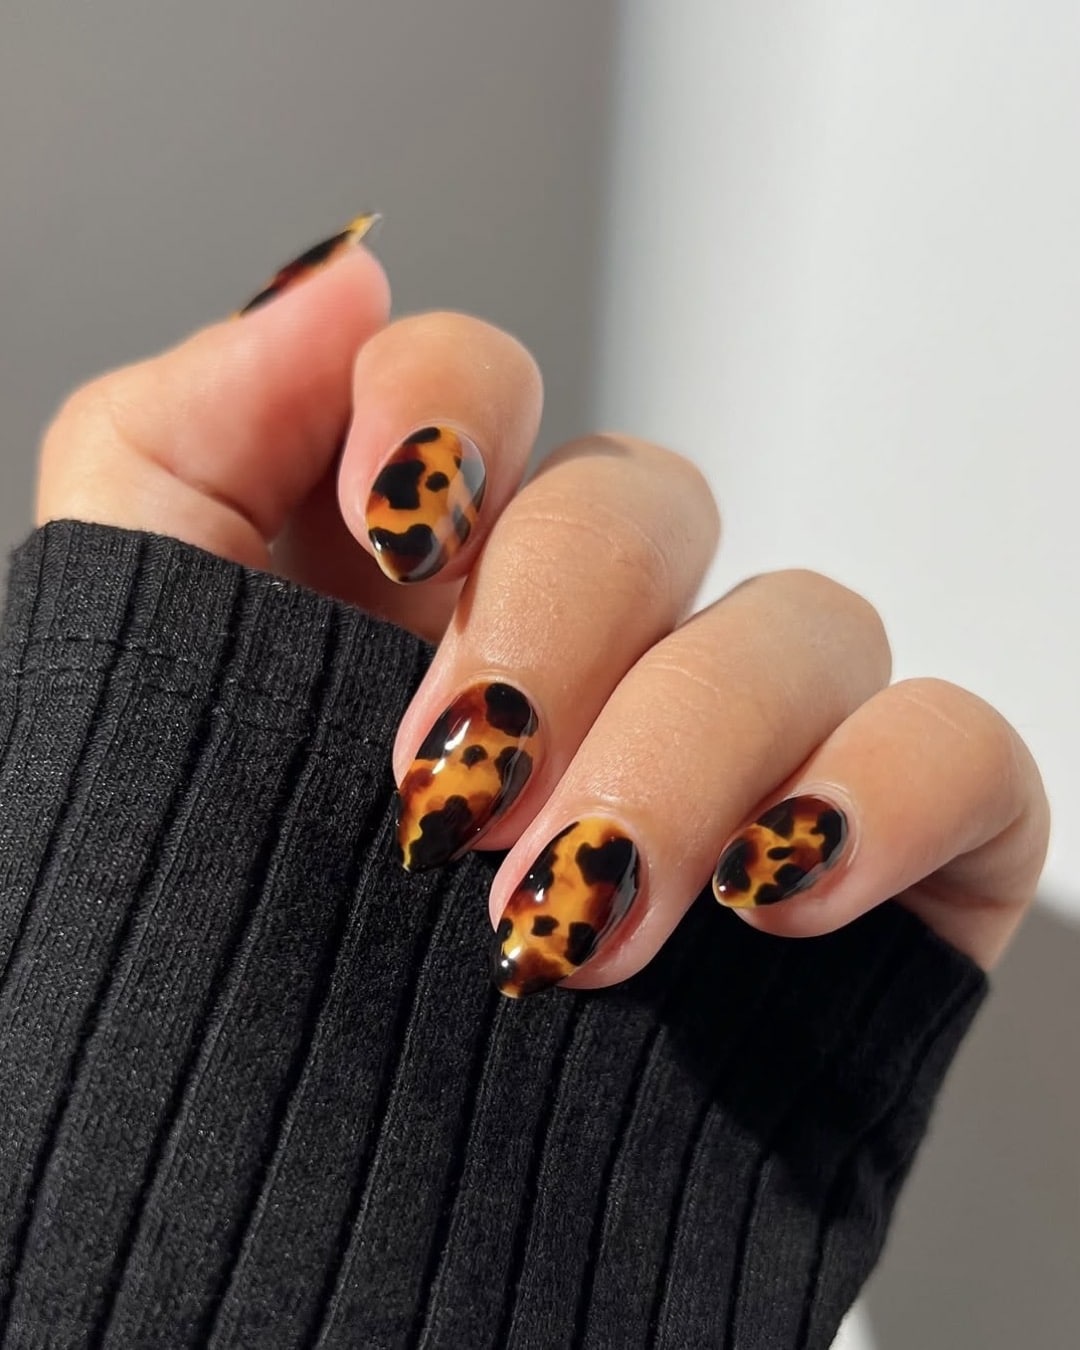
Can you name a nail design that gives Rory Gilmore more than this one? We’ll wait. These nails are the perfect combo of studious and fun. Even though this design is usually done in browns, oranges and black, it can really be done in any neutral color combo. Again, it looks hard, but it’s a lot easier than it looks. Plus, the totally chic end result is *def* worth the work.
What you’ll need:
Amber/brown and black jelly polish
Blooming gel
Dotting tool
Top Coat
UV light
How to: Start off with a coat of your fave amber jelly polish (the jelly polish gives your nails that translucent, glossy look), cure it and then add on a layer of blooming gel. Use a large dotting tool to deck out your nails with random splotches of black jelly polish. Let the dots spread until you get that tortoiseshell effect, and then pop those babies right back under your UV light. Give your nails a lasting glow with, ofc, a clear top coat to finish up.
Glazed Donut Nails
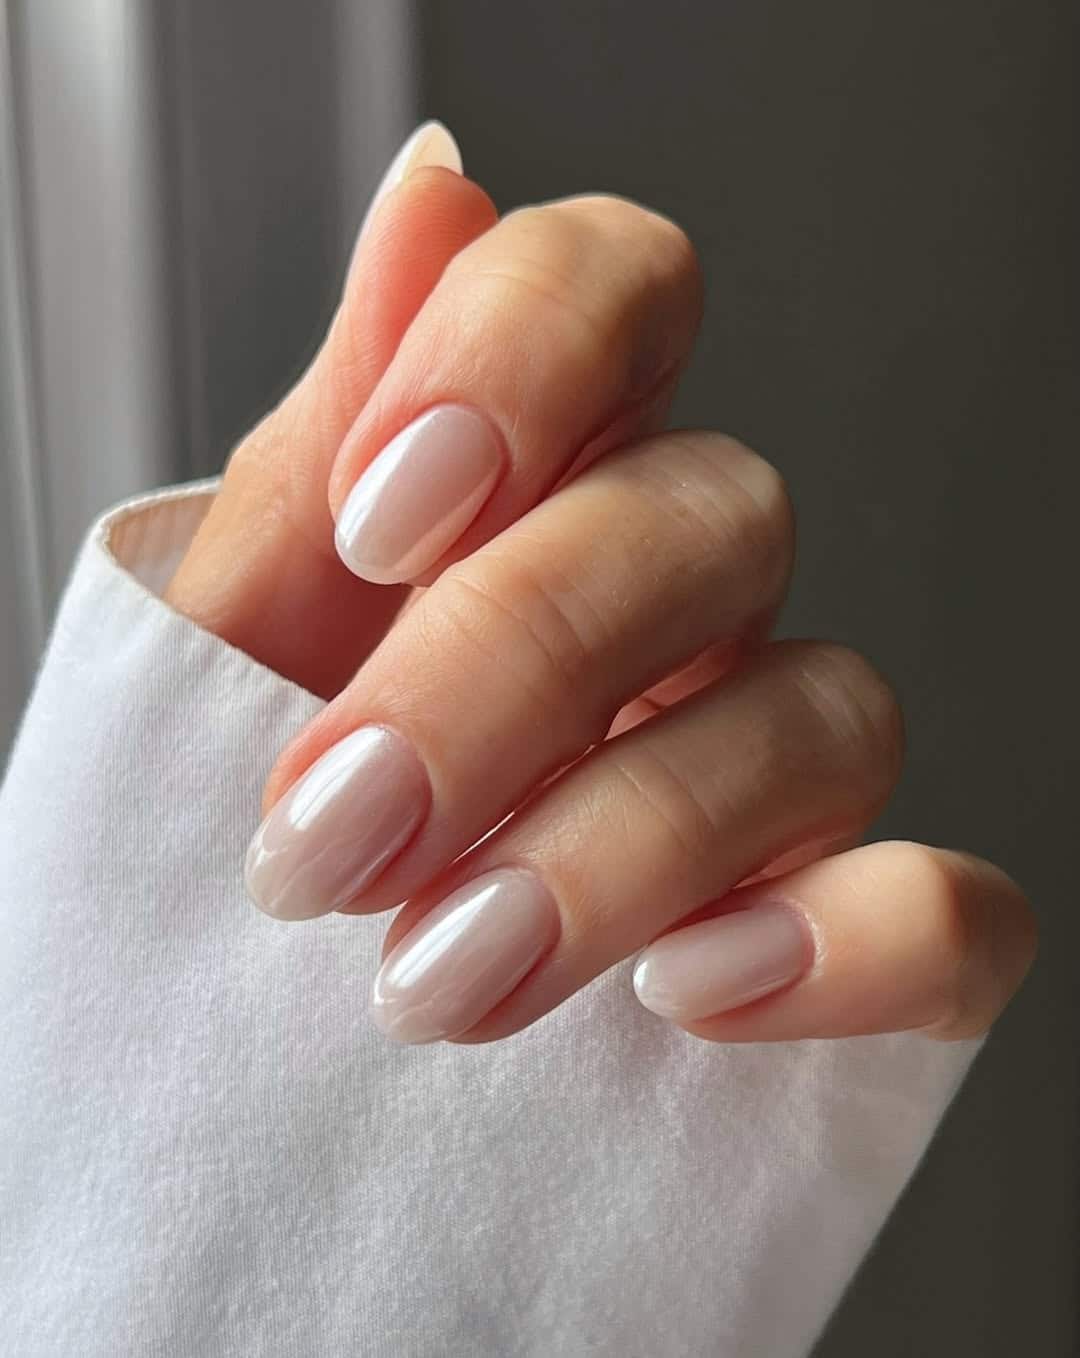
Who doesn’t heart a good Hailey Bieber-inspired mani? Chic, simplistic and sophisticated, this clean girl look is viral for a reason. This trend may seem impossible to recreate (unless you’re using press-ons!), but you can absolutely DIY this look at home with the right polish.
What you need:
Sheer milky polish (we heart the OPI Funny Bunny polish!)
No-wipe gel top coat
Pearly chrome powder
UV light
Eyeshadow applicator
How to: Start with a coat of sheer, milky polish. Let it cure and swipe on your no-wipe gel top coat. Cure the top coat under the UV light until it’s mostly dry, but still a little tacky (about 10 secs). Then, use an old eyeshadow applicator to rub some chrome powder onto your slightly sticky mani. Dust off any extra powder, add another clear top coat, and let your nails cure one last time for 60 secs. Your sugary sweet mani should be good to go!
Tag us on IG @girlslifemag showing off your new mani set!
Looking for more nail inspo? Check out our other articles down below!
💅 5 Cozy-Cute Nail Ideas You Need To Try This Fall
💅 6 Nail Trends To Try This Summer
💅 7 Nail Looks We’re Obsessed With For The Fourth Of July
Images: @maddiej_nails, @peachinails, @heluviee, @nailsbyzola, @bara.hoyle